Physical Address:
ChongQing,China.
WebSite:

Just Love Coding,Love Share And Writting


Android14已经出来一段时间了,虽然一直都是Beta Version,但行业内已经有厂商开始了适配。近期我也开始了这方面的相关工作,该文章用于记录我在AOSP14移植过程中遇到的一些典型问题。由于移植过程中的涉及到的模块比较多,遇到的问题也比较繁杂,此处仅记录问题的解决思路与方法,涉及到一些更深层次的知识不做深究。
基线选择:在我开始移植时,AOSP14已经发布了最新的r18版本,抱着要用就用最新的想法,我们也选用了r18作为我们移植的源码Base。其版本信息如下:
Manifest链接参考这里。
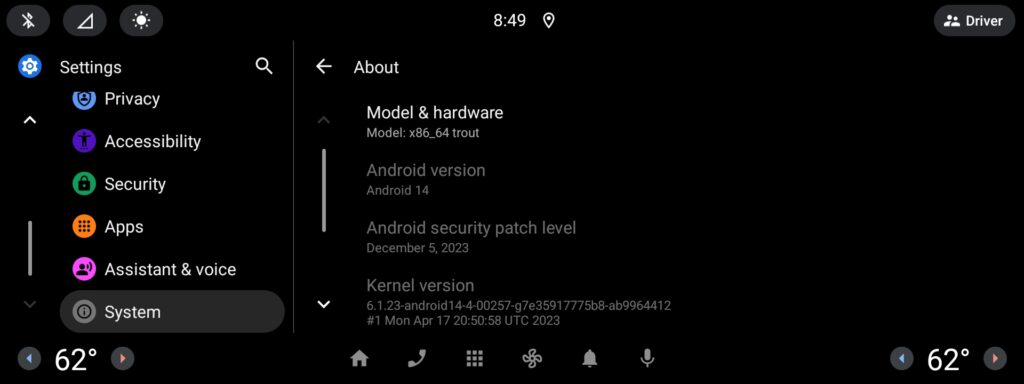
Kernel选择:AOSP14默认使用Kernel 6.1.23,版本信息:6.1.23-android14-4-00257-g7e35917775b8-ab9964412;但也支持5.10,5.15等早期版本。由于我是从AOSP12升级至AOSP14,Kernel部分仍选择5.10版本。
硬件上使用的是我司自己设计生产的开发板,具体信息略过不表。
移植时将相关的配置部分迁移至AOSP14源码目录下的device/${VENDOR_NAME}内;将HAL实现相关迁移至AOSP14源码目录下的hardware/${VENDOR_NAME}内,其余我们自定义的部分如App等迁移至AOSP14源码目录下,新建vendor目录。其目录规划如下:
| 模块 | 目录 | 备注 |
| APP | packages/apps/*:原生APP vendor/${OEM_NAME}/apps/*:特性APP,不区分board | |
| FrameWork | / | |
| Native | / | |
| HAL | hardware/interfaces/* vendor/${{VENDOR_NAME }/hardware/interfaces/* hardware/${VENDOR_NAME}/interfaces/* | HAL分为原生HAL和我们自定义/实现的HAL 自定义实现的HAL统一放置于 hardware/${VENDOR_NAME}/interfaces/* vendor/bst/hardware/interfaces/* |
| device/${OEM_NAME} | ${CHIP}/${BOARD} …… | |
| hardware/${OEM_NAME} | ${CHIP}/${BOARD} …… Audio Camera Bluetooth ${MODULE} ….. | 文件夹目录主要分为Chip相关和Module相关;Module相关如audio,camera,bt等,用于存放代码实现,如果有部分代码实现跟平台相关,则建平台子目录区分;Chip相关则存放配置文件、makefile等;同一模块不同Chip之间的差异应通过Chip目录内的配置或者makefile实现区分 |
| vendor/${OEM_NAME} | ${CHIP}/${BOARD} …… Audio Camera Bluetooth ${MODULE} ….. | 文件夹目录主要分为Chip相关和Module相关;Module相关如audio,camera,bt等,用于存放代码实现,如果有部分代码实现跟平台相关,则建平台子目录区分;Chip相关则存放配置文件、makefile等;同一模块不同Chip之间的差异应通过Chip目录内的配置或者makefile实现区分 |
1.BOARD_BUILD_SYSTEM_ROOT_IMAGE is obsolete
这是由于在AOSP14中,BOARD_BUILD_SYSTEM_ROOT_IMAGE 已经被废弃;同时使用BOARD_BUILD_GKI_BOOT_IMAGE_WITHOUT_RAMDISK进行替换。
具体修复示例可参考该链接。
2.ndk相关依赖报错:undefined module “android.hardware.xxxxx-V1-ndk_platform”
由于AOSP14中ndk_platform后端已经被废弃,采用ndk后端可以同样满足开发者的需求,因此在相关库的支持中我们不再需要ndk_platform的后端,编译时出现这些报错,我们可以找到对应的Android.bp,替换相应的依赖库即可,示例如下:
         "android.hardware.audio@6.0",
         "android.hardware.audio.common@6.0",
         "android.hardware.audio.effect@6.0",
-        "android.hardware.automotive.audiocontrol-V1-ndk_platform",
-        "android.frameworks.automotive.powerpolicy-V1-ndk_platform",
+        "android.hardware.automotive.audiocontrol-V1-ndk",
+        "android.frameworks.automotive.powerpolicy-V1-ndk",
         "audiocontrol-caremu",
         "libbase",
         "libbinder",
3.out/host/linux-x86/mkdtboimg.py不存在
AOSP14中对mkdtboimg做了一些变更,修改了其名称,因此我们也需要同步这部分改动;
MKDTBOIMG               := system/libufdt/utils/src/mkdtboimg.py
或者
MKDTBOIMG              := $(HOST_OUT_EXECUTABLES)/mkdtboimg
至于mkdtboimg具体是干嘛的呢,看名字就能猜个大概:用于创建设备树二进制对象,我们烧录镜像的dtbo.img,就需要通过此工具进行打包。
4.提示framework compatibility matrix are incompatible
这是由于我们集成的HAL与framework_compatibility_matrix.xml不匹配导致,解决办法要么是重新检查集成打包的HAL,确保framework_compatibility_matrix.xml中记录的HAL都被集成,且版本信息保持一致;要么将未被集成的HAL组件从framework_compatibility_matrix.xml中删除。
5.SEPolicy配置file.te sysfs_gpu 重定义错误
解决该问题的办法很简单,直接屏蔽发生重定义的地方;需要说明的是,在SEPolicy中,type定义的类型是不允许重复的。
6.内核速率限制导致init进程日志无法打印
在移植过程中,我们需要尽可能详细的日志,以确保启动过程中的任何异常都能被及时观察到。但是我在移植过程中频繁见到这样的信息;
printk: init: 141 output lines suppressed due to ratelimiting这表明某些时候init进程打印到Kernel内的日志可能会因为速率限制而导致无法打印,这会严重影响我们对问题的诊断。此时我们需要修改内核代码,放宽这些限制。内核的日志速率限制依靠宏定义,默认的内核日志速率限制为5s内10条,这里更改内容如下:
iff --git a/include/linux/ratelimit_types.h b/include/linux/ratelimit_types.h
index b676aa419..db7eb5be2 100644
--- a/include/linux/ratelimit_types.h
+++ b/include/linux/ratelimit_types.h
@@ -7,7 +7,7 @@
 #include <linux/spinlock_types.h>

 #define DEFAULT_RATELIMIT_INTERVAL     (5 * HZ)
-#define DEFAULT_RATELIMIT_BURST                10
+#define DEFAULT_RATELIMIT_BURST                1000
将其速率限制放宽为5s内1000条,需要说明的是过多的日志打印会影响系统的启动。
7.init进程日志调整
除了上述Kernel的日志打印限制,init自身也存在一些日志的限制。在移植调试阶段,我们可能会对init进程的日志做一些调整,主要包含两个方面:
1)调整相关宏定义:init的源码中会根据编译宏来选择性地打印某些日志,如下所示:
 if (LOG_UEVENTS) {
        LOG(INFO) << "event { '" << uevent->action << "', '" << uevent->path << "', '"
                  << uevent->subsystem << "', '" << uevent->firmware << "', " << uevent-
                  >major<< ", " << uevent->minor << " }";
    }
这里我们会看到,init会根据LOG_EVENTS的宏定义打印额外的日志,该宏定义通过Android.bp中的cflags进行控制:
cflags: [
        "-DALLOW_FIRST_STAGE_CONSOLE=0",
        "-DALLOW_LOCAL_PROP_OVERRIDE=0",
        "-DALLOW_PERMISSIVE_SELINUX=0",
        "-DANDROID_BASE_UNIQUE_FD_DISABLE_IMPLICIT_CONVERSION",
        "-DDUMP_ON_UMOUNT_FAILURE=0",
        "-DINIT_FULL_SOURCES",
        "-DINSTALL_DEBUG_POLICY_TO_SYSTEM_EXT=0",
        "-DLOG_UEVENTS=0",
        "-DREBOOT_BOOTLOADER_ON_PANIC=0",
        "-DSHUTDOWN_ZERO_TIMEOUT=0",
        "-DWORLD_WRITABLE_KMSG=0",
        "-Wall",
        "-Werror",
        "-Wextra",
        "-Wno-unused-parameter",
        "-Wthread-safety",
    ],
在必要时我们需要手动调整这些宏定义,以尽可能地获取日志。
2)调整日志等级:init自身也有一套自己的日志等级,我们可以通过在init.rc中加入loglevel字段来控制其日志等级,其日志等级分为7-0,其中日志7属于最低等级,所有日志都会打印,0则属于最高等级,仅打印ERROR类型的日志。
#Sets init's log level to the integer level, from 7 (all logging) to 0 (fatal logging #only). The numeric values correspond to the kernel log levels, but this command does #not affect the kernel log level. Use the write command to write to #/proc/sys/kernel/printk to change that.Properties are expanded within level.

on early-init
   loglevel 7
需要注意的是,设定loglevel的时机一般在early-init阶段。
8.logd未启动时输出日志到内核日志
在移植调试过程中遇到的一个情况是,logd未启动或者启动失败,使用Android日志系统打印的日志无法记录下来,这对诊断服务启动失败这类问题是比较麻烦的,不过我们可以在服务的rc配置中加入stdio_to_kmsg字段来使这部分日志打印到Kmsg中,如下所示:
service prng_seeder /system/bin/prng_seeder
    user prng_seeder
    group prng_seeder
    stdio_to_kmsg
    socket prng_seeder stream+listen 0666 prng_seeder prng_seeder
9.出现”Vold-failed“,”boringssl-self-check-failed“等错误
出现这些错误时,许多守护进程如vold,logd,lmkd等未能正常启动,一些报错日志如下所示:
1352: [    8.769387] init: cannot execv('/system/bin/prng_seeder'). See the 'Debugging init' section of init's README.md for tips: No such file or directory
1769: [   13.781216] init: cannot execv('/system/bin/prng_seeder'). See the 'Debugging init' section of init's README.md for tips: No such file or directory
1916: [   15.625308] init: cannot execv('/system/bin/logd'). See the 'Debugging init' section of init's README.md for tips: No such file or directory
1930: [   15.783286] init: cannot execv('/system/bin/lmkd'). See the 'Debugging init' section of init's README.md for tips: No such file or directory
1950: [   15.938412] init: cannot execv('/system/bin/sh'). See the 'Debugging init' section of init's README.md for tips: No such file or directory
1970: [   16.152591] init: cannot execv('/system/bin/carwatchdogd'). See the 'Debugging init' section of init's README.md for tips: No such file or directory
2147: [   18.800270] init: cannot execv('/system/bin/prng_seeder'). See the 'Debugging init' section of init's README.md for tips: No such file or directory
2270: [   20.660487] init: cannot execv('/system/bin/logd'). See the 'Debugging init' section of init's README.md for tips: No such file or directory
2282: [   20.805788] init: cannot execv('/system/bin/lmkd'). See the 'Debugging init' section of init's README.md for tips: No such file or directory
2294: [   20.960923] init: cannot execv('/system/bin/sh'). See the 'Debugging init' section of init's README.md for tips: No such file or directory
2300: [   21.012662] init: cannot execv('/system/bin/vold'). See the 'Debugging init' section of init's README.md for tips: No such file or directory
更早一些的日志提示如下:
[    6.107744] e2fsck: linker: Warning: failed to find generated linker configuration from "/linkerconfig/ld.config.txt"
[    6.118354] e2fsck: WARNING: linker: Warning: failed to find generated linker configuration from "/linkerconfig/ld.config.txt"
通过对比AOSP14 Cuttlefish的启动日志,没有发现上述错误;从报错信息来看,像是系统找不到对应执行的binary,直觉告诉我可能与/linkerconfig/ld.config.txt文件有关;我在正常运行的系统中查看该文件内容:
dir.system = /system/bin/
dir.system = /system/xbin/
dir.system = /system_ext/bin/
dir.product = /product/bin/
dir.vendor = /odm/bin/
dir.vendor = /vendor/bin/
...
推测ld.config.txt用于指导安卓系统去执行、链接系统中的各种binary或者so库,我们在init.rc中可以看到如下说明:
# Run apexd-bootstrap so that APEXes that provide critical libraries
# become available. Note that this is executed as exec_start to ensure that
# the libraries are available to the processes started after this statement.
exec_start apexd-bootstrap
进而追踪到init进程源码:
int main(int /*argc*/, char** argv) {
  android::base::InitLogging(argv, &android::base::KernelLogger);
  // TODO(b/158468454): add a -v flag or an external setting to change severity.
  android::base::SetMinimumLogSeverity(android::base::INFO);

  // set umask to 022 so that files/dirs created are accessible to other
  // processes e.g.) /apex/apex-info-list.xml is supposed to be read by other
  // processes
  umask(022);

  InstallSigtermSignalHandler();

  android::apex::SetConfig(android::apex::kDefaultConfig);

  android::apex::ApexdLifecycle& lifecycle =
      android::apex::ApexdLifecycle::GetInstance();
  bool booting = lifecycle.IsBooting();

  const bool has_subcommand = argv[1] != nullptr;
  if (!android::sysprop::ApexProperties::updatable().value_or(false)) {
    if (!has_subcommand) {
  }

  if (has_subcommand) {
    return HandleSubcommand(argv);
   }
   ....
  }
在其main函数内处理时,我们看到apexd首先判断是否存在启动参数,再通过android::sysprop::ApexProperties::updatable().value_or(false)区分进入不同的分支;通过观察出现问题时的日志和Trout中正常启动的日志,发现两者进入不同的分支,最终找到/build/make/target/product/updatable_apex.mk:
ifneq ($(OVERRIDE_TARGET_FLATTEN_APEX),true)
  # com.android.apex.cts.shim.v1_prebuilt overrides CtsShimPrebuilt
  # and CtsShimPrivPrebuilt since they are packaged inside the APEX.
  PRODUCT_PACKAGES += com.android.apex.cts.shim.v1_prebuilt
  PRODUCT_VENDOR_PROPERTIES := ro.apex.updatable=true
  TARGET_FLATTEN_APEX := false
  # Use compressed apexes in pre-installed partitions.
  # Note: this doesn't mean that all pre-installed apexes will be compressed.
  #  Whether an apex is compressed or not is controlled at apex Soong module
  #  via compresible property.
  PRODUCT_COMPRESSED_APEX := true
endif
我们可以看到android::sysprop::ApexProperties::updatable()获取的值就是ro.apex.updatable的值,进而生成ld.config.txt,因此我们将该makefile在我们自己的device.mk中进行引用,即解决该问题。
10.adb remount,提示Device must be bootloader unlocked
该日志对应的源码位于fs_mgr_remount.cpp内,如下所示:
//system/core/fs_mgr/fs_mgr_remount.cpp
if (android::base::GetProperty("ro.boot.verifiedbootstate", "") != "orange") {
      LOG(ERROR) << "Device must be bootloader unlocked";
      return EXIT_FAILURE;
}
通过搜索Makefile,并没有发现直接设置ro.boot.verifiedbootstate的地方,但发现通过BOARD_KERNEL_CMDLINE 设定verifiedbootstate,同时对比Trout的makefile,最终确认修改BoardConfig.mk
BOARD_KERNEL_CMDLINE += androidboot.verifiedbootstate=orangeBingo,最终编译之后烧录系统: